The author is a senior extension associate at Cornell University.

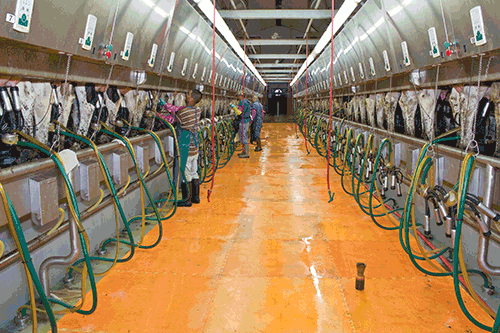
Whether you waltz, two-step or polka your way through the parlor, your milking routine begins far before - and ends long after - the milking units are attached.
We usually decide milking routines based on our preferences, the design or type of milking center, the number of cows, the number of milkers and our quality goals. However, a collaborative process should include your milking technicians, as well as ownership and management.
Of course, many times these three groups are the same person. Your milkers have the greatest influence on achieving the milk quality goals that are set in place for the dairy operation; therefore, input from everyone who milks your cows when creating a milking routine is imperative.
Waltzing to the parlor
The milking routine begins with the first interaction with the cow, and this typically is when the cows are moved from the housing area to the milking area. Adverse interactions with cattle on the way to the parlor can create a scenario where milk is not let down, thus inflating both milking unit on-time and residual milk. It can take 20 to 30 minutes for a cow to return to a normal hormonal state after just one adverse interaction.
Once the cows are in the milking area, the premilking routine takes on four aspects. These are the cleaning and disinfecting of the teat, mastitis detection and stimulation. There is no "golden key" to the milking routine. However, there are a few important factors that need to be included in all routines.
Forestripping serves two purposes. The first is detection of abnormal milk, and the second is stimulation. Forestripping is the only way to visually detect abnormal milk during the premilking process.
Next, the teats, and especially the teat ends, need to be cleaned. Cleaning the teat end is important to milk quality and teat-end health. As with any form of cleaning, it requires less time to clean the teat and teat end if both come to the milking center not soiled with organic matter. It does take time to clean a dirty teat end. But once you've cleaned the teat end it is easier to keep it clean in the future.
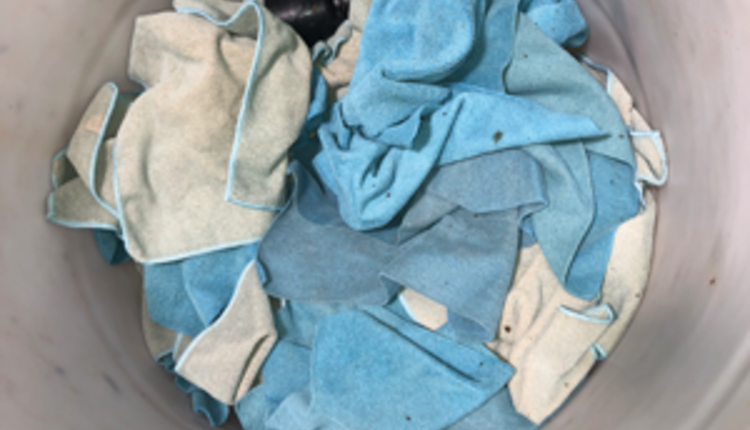
The use of a proven predip will help in the prevention of environmental mastitis. Teat dip was developed to be a disinfecting agent, not a cleaning agent. So, applying teat dip to soiled teats defeats the purpose of disinfecting the teat. Teats that are extremely soiled should be cleaned with a single-use towel prior to predipping.
Timing is everything when it comes to the milking routine. Consistency from cow-to-cow at every milking is a must; therefore, perfecting the premilking routine is important. If one milker is out of step during the milking process, then the entire timing for each and every cow may be different.
When milking cows twice daily, the prep-lag time should be 60 to 90 seconds. When milking three times daily, the prep-lag time should be 90 to 120 seconds. It is important to make sure that each cow at each milking shift gets the same lag time.
Choreographing quality
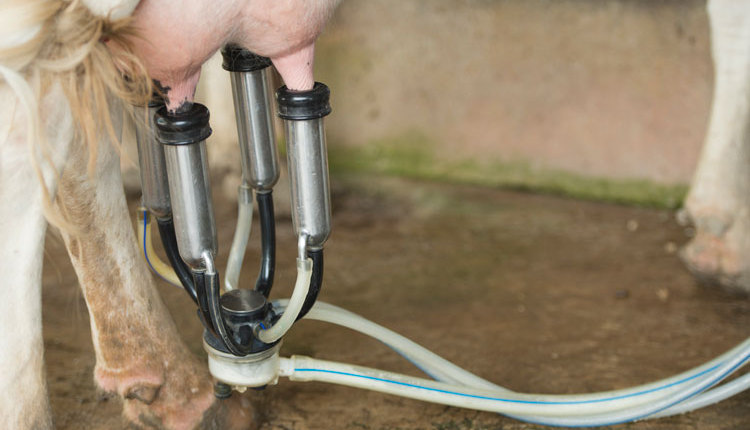
Once the milking unit is attached, your job in ensuring quality milk is not over. Milking unit alignment is one of the most neglected areas in the parlor. If a milking unit is out of alignment, liner slips and falloffs may soar. It could also cause an uneven milkout.
The milking unit should hang squarely below each quarter and be parallel to the floor. A liner slip causes "back jetting" - an unwanted form of air admission into the milking unit. This air admission causes the formation of aerosols that can introduce bacteria to the teat canal of the other quarters, putting the cow at risk for mastitis. Continually listen and look to make sure that all units are aligned properly. Each cow should be observed for unit alignment during the milking process.
Proper detacher settings are also an aspect of the milking process that shouldn't be overlooked. An attached milking unit with no milk flow can cause teat end issues. Setting the milking unit in "manual" mode should be avoided as much as possible. Remind your milkers to limit the "manual" detacher setting and inform them that a milking unit left on too long could lead to future health issues.
Postdipping with a proven teat dip will aid in the protection of the teat end until it closes. Postdip is used in the control of contagious mastitis-causing organisms. The use of postdip with emollients can also improve the health of the teat skin and reduce the risk of bacteria colonizing cracks in the teat skin.
Movement of cows back to the pen is the final leg of the dance. Keep walkways to and from the parlor clean so as not to contaminate the udder with manure during cow movement. Make sure the stalls are clean and dry when the cows return to their housing area. Fresh feed should be available when the cows return to their pen so they stay standing and allow time for the teat to close before lying down. It normally takes one hour for the teat end to close after milking.
Milker training and follow-up are crucial to any successful milk quality program. Most milking routines are implemented at a training session over a short period of time. With a new milking routine comes change, and change means creating new habits.
Without feedback, milkers may not know why they are performing a task or if the task has a positive benefit. Provide milkers with milk quality results that track their progress and even consider an incentive program for everyone who impacts milk quality.
Follow-up is more than holding a milker meeting and discussing the latest milk quality report. Follow-up requires that management spend time in the milking center observing the milking routine. Today's technology related to milking cows can tell us a lot about flow rates, cows per hour and so forth. It takes visual observation of the milking routine to see that the current routine requires more towels, cows are packed too tightly in the holding area or too much water is being used in the milking center during milking.
It takes more than a one- or two-hour training session to get a new milking routine right. Show your milkers that you want to be a dance partner, not a coach - it takes two to tango. People are the key to the success of the milking routine.
Your milking routine is the area of milk quality that people have the most control over. But it also has the most variation from milker-to-milker and from shift-to-shift. The design of the milking center, type of parlor, number of cows to be milked, number of milkers and milk quality goals all influence the steps of the milking routine. Once your milk quality goals have been met, it is easier to stay at that goal than it was to get there. The creation of the milking routine should include the choreographer (management) and dancers (milkers) in order to have the best possible performance.

We usually decide milking routines based on our preferences, the design or type of milking center, the number of cows, the number of milkers and our quality goals. However, a collaborative process should include your milking technicians, as well as ownership and management.
Of course, many times these three groups are the same person. Your milkers have the greatest influence on achieving the milk quality goals that are set in place for the dairy operation; therefore, input from everyone who milks your cows when creating a milking routine is imperative.
Waltzing to the parlor
The milking routine begins with the first interaction with the cow, and this typically is when the cows are moved from the housing area to the milking area. Adverse interactions with cattle on the way to the parlor can create a scenario where milk is not let down, thus inflating both milking unit on-time and residual milk. It can take 20 to 30 minutes for a cow to return to a normal hormonal state after just one adverse interaction.
Once the cows are in the milking area, the premilking routine takes on four aspects. These are the cleaning and disinfecting of the teat, mastitis detection and stimulation. There is no "golden key" to the milking routine. However, there are a few important factors that need to be included in all routines.
Forestripping serves two purposes. The first is detection of abnormal milk, and the second is stimulation. Forestripping is the only way to visually detect abnormal milk during the premilking process.
Next, the teats, and especially the teat ends, need to be cleaned. Cleaning the teat end is important to milk quality and teat-end health. As with any form of cleaning, it requires less time to clean the teat and teat end if both come to the milking center not soiled with organic matter. It does take time to clean a dirty teat end. But once you've cleaned the teat end it is easier to keep it clean in the future.
The use of a proven predip will help in the prevention of environmental mastitis. Teat dip was developed to be a disinfecting agent, not a cleaning agent. So, applying teat dip to soiled teats defeats the purpose of disinfecting the teat. Teats that are extremely soiled should be cleaned with a single-use towel prior to predipping.
Timing is everything when it comes to the milking routine. Consistency from cow-to-cow at every milking is a must; therefore, perfecting the premilking routine is important. If one milker is out of step during the milking process, then the entire timing for each and every cow may be different.
When milking cows twice daily, the prep-lag time should be 60 to 90 seconds. When milking three times daily, the prep-lag time should be 90 to 120 seconds. It is important to make sure that each cow at each milking shift gets the same lag time.
Choreographing quality
Once the milking unit is attached, your job in ensuring quality milk is not over. Milking unit alignment is one of the most neglected areas in the parlor. If a milking unit is out of alignment, liner slips and falloffs may soar. It could also cause an uneven milkout.
The milking unit should hang squarely below each quarter and be parallel to the floor. A liner slip causes "back jetting" - an unwanted form of air admission into the milking unit. This air admission causes the formation of aerosols that can introduce bacteria to the teat canal of the other quarters, putting the cow at risk for mastitis. Continually listen and look to make sure that all units are aligned properly. Each cow should be observed for unit alignment during the milking process.
Proper detacher settings are also an aspect of the milking process that shouldn't be overlooked. An attached milking unit with no milk flow can cause teat end issues. Setting the milking unit in "manual" mode should be avoided as much as possible. Remind your milkers to limit the "manual" detacher setting and inform them that a milking unit left on too long could lead to future health issues.
Postdipping with a proven teat dip will aid in the protection of the teat end until it closes. Postdip is used in the control of contagious mastitis-causing organisms. The use of postdip with emollients can also improve the health of the teat skin and reduce the risk of bacteria colonizing cracks in the teat skin.
Movement of cows back to the pen is the final leg of the dance. Keep walkways to and from the parlor clean so as not to contaminate the udder with manure during cow movement. Make sure the stalls are clean and dry when the cows return to their housing area. Fresh feed should be available when the cows return to their pen so they stay standing and allow time for the teat to close before lying down. It normally takes one hour for the teat end to close after milking.
Scoring the dance
Milker training and follow-up are crucial to any successful milk quality program. Most milking routines are implemented at a training session over a short period of time. With a new milking routine comes change, and change means creating new habits.
Without feedback, milkers may not know why they are performing a task or if the task has a positive benefit. Provide milkers with milk quality results that track their progress and even consider an incentive program for everyone who impacts milk quality.
Follow-up is more than holding a milker meeting and discussing the latest milk quality report. Follow-up requires that management spend time in the milking center observing the milking routine. Today's technology related to milking cows can tell us a lot about flow rates, cows per hour and so forth. It takes visual observation of the milking routine to see that the current routine requires more towels, cows are packed too tightly in the holding area or too much water is being used in the milking center during milking.
It takes more than a one- or two-hour training session to get a new milking routine right. Show your milkers that you want to be a dance partner, not a coach - it takes two to tango. People are the key to the success of the milking routine.
Your milking routine is the area of milk quality that people have the most control over. But it also has the most variation from milker-to-milker and from shift-to-shift. The design of the milking center, type of parlor, number of cows to be milked, number of milkers and milk quality goals all influence the steps of the milking routine. Once your milk quality goals have been met, it is easier to stay at that goal than it was to get there. The creation of the milking routine should include the choreographer (management) and dancers (milkers) in order to have the best possible performance.


